Wednesday, August 31, 2011

Miss C.'s first quilt

Toward the end of the summer vacation,
Miss C. and I decided to repaint her room.
It was an nice color but too dark for her
and definitively not girly.
So we painted it together a nice lavender shade,
perfect for a small room and little sun
(picture to come...still need to organise the room!).
After we were done, we realized we needed
to add more personality to the room,
(I still need to make the curtains with the fabric I brought back from France)
she knew what was missing: a quilt.
Do not get me wrong here, she had quilts,
made by me, by her grandmother, she is not lacking in the quilt department.
But what was missing was one done by herself!
After all, 7 is the right age to make one!
I took Miss C. to the quilt store and let her choose the fabric.
There were no hesitations, she saw the fabric she loved
(the one on the bottom)
and then chose 5 more to go with it.


Interestingly she chose 5 from the same line, they were placed through out the store,
not together as a collection, I guess it felt right for her.
I added the batik on the top for border/binding.

I cut all the fabric, I was too nervous about letting her using the rotary cutter!
We decided on 6 1/2 inch square.


Miss C. started sewing all these squares together, matching up the sides!
I first I thought we would just use these squares
and make them into a simple quilt,
but it looked a little uninspired.


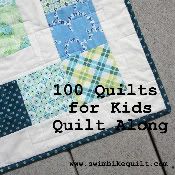
Luckily I had just read this tutorial on Swim, Bike, Quilt,
and decided to use a similar pattern,
instead of a 2 x 2 center,
we went with a 2 x 3 center,
making it a rectangle.
We were able to use of the square that she had sewn,
I just added the border (3 1/2 inch wide) as it is a little harder to sew straight!


There is still some work to be done
 (finish the top, quilt it, bind it, which I will probably do since
 we did not finish before school started!)
but it is turning out to be beautiful,
a perfect quilt for a growing girl!

Happy sewing!


Monday, August 29, 2011

of quilt and school

This week end, after recovering from the hurricane and the lack of power,
I started working on a little quilt for donation.
I had not made one in quite some time,
and it was fun!

I followed the direction from this tutorial from Swim, Bike, Quilt!
and make this top.
I had purchased the flower fat quarters probably 7 years ago,
and this was a great way to use it, may be not very modern
but definitively charming!

I made the top in one afternoon, so a fast and easy project,
now I need to find some fabric for the back...


Today was the first day of school,
it is hard to believe that it is Brick Master's last year of elementary school,
and that Miss C. is already in 2nd grade!


They just keep on growing!
(guess who needs a bigger jacket?!)


Swim, Bike, Quilt


Happy sewing!


Thursday, August 25, 2011

gettin ready for school: the nook cover

Technically this is not really a back to school project,
but Mon Cheri spends a lot of time in the metro,
and we ran out of paperbacks!

It was time to embrace technology,
and go with an electronic reading device.
I guess it was the perfect present for
being one year on his new job.
I jumped on the opportunity to make
a cover for it,
it is not often that I get to sew
something for him!


I was inspired by this cover seen on Flickr,
make of wool felt and leather.


I made mine of wool that I brought back from France,
some imitation leather and quilting fabric.


I cut from the wool 2 rectangles:
10 x 15 and 10 x 5,
from the quilting fabric 1 rectangle:
10 x 11
from the imitation leather:
a square 4 x 4
and a rectangle 10 x 1.
I also used some interfacing for the quilting fabric,
and some velcro.
I used 1/2 inch seam, wool can fray pretty fast!


I sewed the pseudo leather pieces and
 the velcro on the top of the cover,
I sewed both pieces of the inside
and the other side of the velcro.

 
With right side together, I stitched around the top flap,
so just both wool layer, starting and finishing at the quilting fabric.


I then returned the flap, right side out.
I folded under 1/2 inch the bottom of the quilting fabric,
then I folded the rectangle in half, meeting the seam between
the fabric and the wool.
I sewed both side of the rectangle (short sides on the picture)


I did the same thing, on the wool side,
creating 2 pockets.


Then I turned right side out of the wool pocket
and slided inside the cotton pocket.


I then hand stitched the 2 pockets together.
I also top stitched the flap.
And voila a cute manly cover!


Happy sewing!


Wednesday, August 24, 2011

getting ready for school: the pencil pouch

These are our last few days of summer vacation,
we have been visiting friends (with the excitement of the earthquake!),
gone one more time to the beach,
done some yard work,
we are almost ready!

A few more sewing projects before it is officially back to school:
a pencil pouch for Brick Master.


I followed this tutorial from Noodle Head at Sew Mama Sew.
It went fast and well, even if sewing with vinyl is not so easy!
I used a large zipper, hopefully it will make it easier to open and close it,
anyway it will be much better than the one we purchased last year
(it lasted only one week!)
yes one more reason to make it myself!


Now I just need to finish the first day outfits,
and we are good to go!

Happy sewing!


Thursday, August 18, 2011

getting ready for school: the lunch box

We still have a couple days before
school starts,
so we are getting ready!
The backpacks are still good,
but Miss C. needed a new lunch box.
This year I decided to make her one,
ever since I saw this tutorial at Pink Penguin,
I have been wanting to sew one.
So I did!


Isn't it just the cutest?

I used 2 Japanese prints (the snack fabric and the purple/blue flowers),
 some other quilting prints,
and some polka dot oil cloth.


More than 16 years ago, I spent 2 months in Japan,
and one of the things I brought back is
this cute bento box:


So I was very happy to sew my own,
well for Miss C.!


The inside is perfect to pack a sandwich, a fruit
and a drink.
With the oil cloth, it should be easy to clean
any "accident".


The closed top insures that no lunch will be lost!


Overall, it has been a great project,
the tutorial is easy to follow,
I might need to make one for me too,
after all one is never too old for a cute lunch box....
Now where am I going to go eat lunch?

Happy sewing!

sharing at http://kojodesigns.blogspot.com/


Wednesday, August 17, 2011

little pouch: hers, his and mine

I made these 3 little pouches
for our summer trip to France,
I run out of time to show them
(and since I am using my blog as my sewing journal)
so here there are:


For Miss C., I made the usual pouch,
but simplified it.
I just appliqued a ruffled band of seersucker
on the white pique top
(used to make my favorite jacket!),
it is lined with the same seersucker than the ruffle,
it was a fast and easy one!


For Brick Master, I made the pouch a little larger
so that it could accommodate his inhaler.
I also tried to make it cool,
not girly at all!
It is made of drop cloth (!)
with a big zipper
and a double layer applique of scout fabric,
the inside is a camping print from JoAnn (a few years ago).


Finally for myself, I made another version,
I was inspired by this tutorial by See Kate Sew.
I lined it with some black gingham, it it quite large,
I should have used interfacing, it is a little too soft!
There is always room for improvement!


There were very useful!

Happy sewing!

Monday, August 15, 2011

little treasures from our trip

Of course we had to bring back stuff
from our vacation,
the kids had toys and a few new clothes,
I purchased some fabric and trims,
not too much as we were limited in space and weight!


I purchased 3 one yard fall fabrics, perfect for a scarf (purple print)
and big tweed pillows.
I also found these 2 decor fabrics, very wide,
perfect to redo Miss C.'s bedroom.


I went a little crazy with the trims, there were so many choices
so many beautiful things to get,
it was just too much,
so I "tried" to be reasonable....
I have no special plans for them yet,
they just "talk" to me!


On our relaxing days, the ones without castles or other activities,
I worked on a couple embroideries,
small little projects, perfect to take outside.
I chose some Christmas designs,
getting ready for some new ornaments.
I found some beautiful Liberty of London Fabrics
to go with them,
I only purchased fat quarters as they are very pricey!

Now it is time to play with all my new treasures!

Happy sewing!

Tuesday, August 9, 2011

let's talk castles

During our trip, we visited a few castles,
going down dungeons, enjoying History!

 
Le chateau de Lehon, well its ruins!


You can read some details here .


Miss C. likes the "open-concept"!

Le chateau de Dinan:


You can read some details on Wikipedia.


Brick Master has a great time running around
and playing with canon balls!


Le Chateau de Fougeres:


You can read more on Wikipedia

It is very impressive castle,
you can pretend that you are under siege
(and shoot arrows!)

or just enjoying the outdoor


Le Chateau de Trecesson:


still inhabited,
read more on Wikipedia
near the Brocelainde forest.


we were not able to visit it, just look at it!

Next time we visit (in a few years)
we will check out Renaissance castles,
but I have a special weakness for those old medieval castles!

Christmas crafting: it was a busy month!

This December was very busy with a lot of crafting, sewing, quilting, baking. I found it easier to share on Instagram (not something I thou...