Wednesday, December 14, 2016

ready for some hot cocoa?

Once the Christmas tree is done,
the next thing the kids asked for is the cocoa station.
It has become kind of a tradition,
it also lasts through the rest of winter
since it gets chilly in the DC area,
and there is a fair amount of walking back from school.


I like to change it slightly every year.
Here is last year (2015)


And here is the previous here (2014) 


and the year before that (2013).


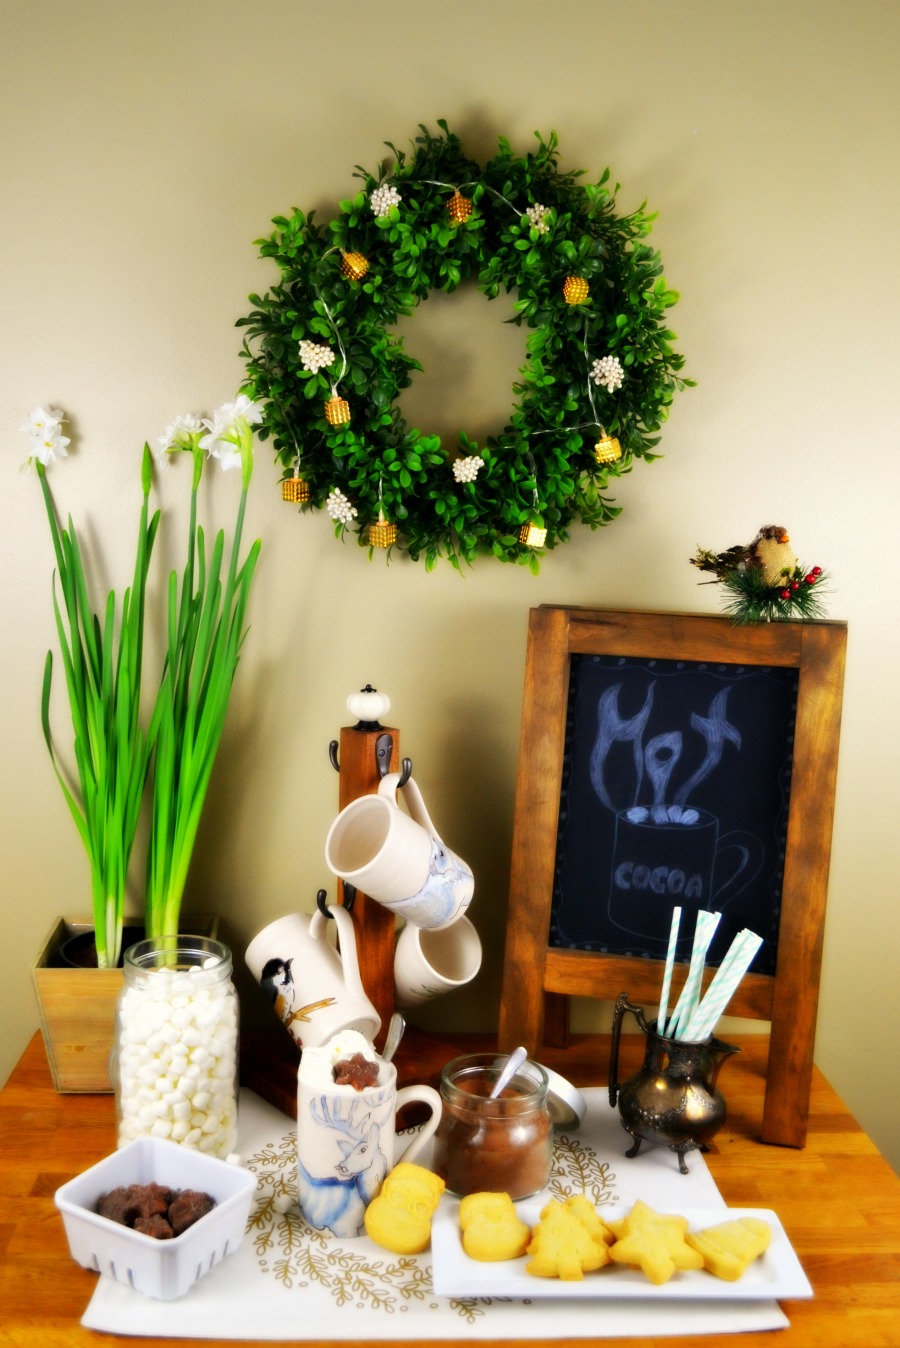
This time, I built a nice mug holder,
following this tutorial from Shanty 2 Chic.


It is basically a 2x2 with 2 pieces of wood as the base.
I had to spray paint my hooks as they were steel color,
and of course I had to touch up the screws
(I sprayed into the lid of the can and used the paint 
with a Qtip to cover the heads of the screws).
For the top, I glued this cool knob on the top (from HomeDepot).
Miss C. is my artist, so she made me this cool sign,
it is on a black piece of paper, cut to size to fit inside my chalkboard easel
(which is slightly too small to write properly...)


There are all the required fixing: powder chocolate (waiting for milk),
marshmallow, chocolate covered marshmallow, whipped cream
and my favorites: cookies!


These are only put out on special occasions,
otherwise we would have a very happy dog!
Malou is truly my dog and we share a love of cookies,
she has been know to borrow them (permanently) when left unattended...
This weekend was so cold,
we had to spend some time hanging around the table,
drinking cocoa and sharing cookies....
the good life!


Happy day!


Monday, December 12, 2016

a Champagne tree

Here is my "Champagne" Christmas tree:
I kept it quite simple:


lights and ornaments,
no ribbons this year, unlike last year.


We did not use any red, so quite a few ornaments stayed in the box,
a few other just had a change of ribbon,
Brick Master was very helpful with that part.


He also put back all the red ribbon in the box,
I think he is edging his bet for next year!
Even at almost 16, he is still interested in decorating the tree,
I really enjoy it as a family tradition.
Miss C. was in charge of placing the many creatures in the tree.


Since it is a live one, it is not perfect,
so the bigger, fluffier animals are perfect to fill in.
They are also quite safe in case Malou decide to trim the tree!


Earlier I had purchase some gold ornaments and blush glass ornaments
(as seen in my Champagne mood board here).
Well there were 35 golden balls and we used them all.
I am quite surprised as I did not think we would need them all.
The pinkish ones are more on the top for safety reasons.
And of course we have at least 3 Eiffel tower....


The velvet and faux fur tree skirt adds a nice touch,
keeping everything soft.


Happy Day!


Thursday, December 8, 2016

stitching body parts

It is the time of the year when sewing as to remain
kind of secretive....
but for this part, I can share:

legs and arms of upcoming deer!
(not as scary as the title may let you to believe)

This year I am making again some Dandelion doe,
just like last year.

Here are the four deer I made last Christmas:

the one on the left was for my mom (here),
the one on the right was for my sister (here).

the one on the left was for my niece K (here)

and this last deer was for my mother in law (here).

So if you wanted one last year and did not get one,
may be this year is your year!

This season, they do not need to travel,
so I am taking my time sewing them.
There is a fair amount of hand sewing,
and since I am done with my intense cross stitching advent calendar,
it has become my new evening activity.
I will share them as I finish them,
but I am planning on keeping one for me!

Happy sewing!

Monday, December 5, 2016

a new soft tree skirt

Since I decided to use a different color scheme this year for Christmas,
I would like it to be a "Champagne" Christmas,
I needed a new tree skirt.
Here is what I sewed:


a cotton velvet with a faux fur border.

(it is hard to take some pics, the dog really likes to lay down on it...yep it is soft!)

My inspiration for this tree skirt was :

 the Pottery Barn velvet tree skirt.

I think it is a pretty good copy!
I started with a velvet curtain panel from IKEA,
I had purchased a pair and only did one panel for Brick Master's room
(we are working on it, slowly!).

I did the classic trick of folding the fabric diagonally to have a square,and cut it out,
then fold it into quarters, draw part of a circle and cut it out.

I made a mini version out of felt to better show you how I made it:


I made and sewed some bias binding (out of the velvet)
for the small cut-out circle.
Then I refolded the tree skirt into quarters and use it as a pattern
to cut out 4 pieces faux sheepskin (for the bottom part)
and about 6 inch wide,


Then I stitched the 4 pieces into a continuous band
that I finally attached to the bottom of the skirt (the longest part).


The tricky part is pinning it the right way: wrong side of the velvet to right side of the fur,
so that when the fur is flipped on the right side of the velvet,
it is also on the right side.


For the shorter side of the fur, I just turned under a 1/4 ish inch , 
and top-stitched all around.
Finally I attached some binding on the opening,
leaving no raw edges.
Before attaching the binding, I added some loops
to secure the edges later on with buttons.


We purchased our tree this week end,
and started decorating it,
it is really coming along!


Come back later to see my version of a Champagne Christmas!

Happy sewing!

Thursday, December 1, 2016

cross stitched advent calendar

Here it is:
my cross stitched advent calendar!


I love it!
It turned out just as I had hoped.
The pics are a little dark, I finished it last night.
It also seats in my little reading corner in the master bedroom, a tight space!

I even reused the frame that was already there:


which seems very fitting since it was previously Miss C's American Doll advent calendar:


But right now, it is all mine!


Previously, I shared the cross stitched numbers here (for the first trough 9)
and here (for 10-18).
Here are the last few:

(18 is back, since 17 was not finished for the previous post!)

After all the numbers were embroidered,
I made 24 little bags with box corners
and 24 more out of white on white lining fabric.


here is the pile with the lined bags over the cross stitched ones,
yep this took a while!


But it makes for a clean finish bag,


I did take a short cut and machine stitched
 the side opening of the lining bag
(usually I hand stitched those...!)

But here they all are,
and they make me happy....


Now this calendar might be too cute to stay in the master bedroom,
it might need to come downstairs...
or at least I need to decorate that reading nook more.

Remember at the beginning when I said it was mine,
here are the calendars the kids have:

Miss C. chose a TsumTsum one,
and Brick Master a chocolate one (from IKEA)


They were quite happy to get out of bed this morning,
not bad for a tween and a teen!

Happy sewing!

sharing:

the creative circle

the inspiration gallery

Christmas crafting: it was a busy month!

This December was very busy with a lot of crafting, sewing, quilting, baking. I found it easier to share on Instagram (not something I thou...