Showing posts with label card. Show all posts

Friday, February 8, 2019

a new stationery kit

I sewed a super cute stationery kit,
perfect to carry a few cards
and write outside.


While it is a simple design, I added some details with a layered applique tag.
It complements nicely the Tilda Cottage fabric,
that I used previously to make a jewelry bag:

(same print but in red!)

For the inside, I used more of the blue print collection:


with large pockets to store note cards, stamps....
I made a few simple cards with some pretty scrapbooking paper,
it is fun to play with paper too, even if fabric is my favorite media!

Sewing this kit was quite easy,
I cut 2 identical rectangles from inside and outside print,
I ironed on fusible fleece to the outside print
and appliqued the tag.
Then I cut a piece of fabric for the pocket,
same width as the other rectangles
but twice the height of my desired pocket.
I folded it in half and topstitched at the fold.

Then I stitched it to the outside print
(the opposite of where you want it in the end!)
on all the sides, so totally stitched to the front!


Then I put the inside rectangle on top with right side facing each other,
and stitched all around except for a few inches,
this opening needs to be at the bottom of the pocket.
Then I turned everything right side out through the opening
 at the bottom of the pocket.
I pressed everything nicely
and hand stitched the bottom,
but it does not need to be done perfectly....


because, when the pocket is flipped to the inside,
it hids that seam!
Just like magic!
I love that trick, so much neater.


Then I topstitched all around and in the middle
to finish making it a little booklet!


Happy sewing!


Thursday, January 10, 2019

a sweet sew illustrated card

I am starting out the year slowly with a easy little project:
a sew illustrated card.


I have really enjoyed doing a lot of sew illustrated projects over the last 2 years,
like the pincushions


the baskets


and the many mug rugs....


This year, I received this book from Minki Kim for Christmas:


 more inspirations and more little sewing!

I sewed these little flowers on linen with purple thread (lighter than black)
and a mix of print, so little fabric is needed!


The finish appliqued is then machine stitched it to a watercolor card
with hand quilting thread and a large needle
(that I reserved for sewing on paper)

The perfect happy first project of the year! 


Happy sewing!

Wednesday, February 18, 2015

Sewing configuration book

Every year for my Mom’s birthday, I have fun coming up with some sewing related present, and this year, I think it is another great one: a book.


Not any kind of book, not one of these boring book with words (!) but one full of little trinkets and mementos! I started out with a Tim Holtz configuration book and collected treasures to fill it all. Besides all the sewing related items I was able to find to decorate the box (scissors, initial, bobbins, thimble….) I was able to use copies of a true family heirloom: my grandmother pattern drafting school drawings. I have her notebooks from her classes, they probably date from before WWII.
I scanned a few pages and printed reduced versions to use in the book. 


so cute, right?!
I covered the box with scrapbooking paper, and I used some linen for the spine. To decorate the cover of the book,  I started with a mini version of my grandma’s page, and layered gently with some lace, linen spool, stamp, buttons and mini cardboard tiles spelling sewing studio in French.


I used various paper inside the individual boxes, I only covered the back and bottom
and used washi tape on the edges as suggested by Tim Holtz.
It finishes everything very nicely.
I dye cut a dress form out of cardboard, linen and wood veneer,
and layered them. I added a little French lace to the collar,
leaving the rest just simple.


I used one of my stamped sign on some felt, and glued a little bobbin.
The scissors are not real, they are just the right side for that little cubby!


For the inside page, I used another copy of my grandma drafting drawing,
attached to the page with washi tape.
A little lace and a tiny cupcake finish the page,
keeping simple.


Here are some of the other sewing related presents I made for my mom's bday
over the last few years:


Bon anniversaire Maman

Happy day!


Wednesday, July 25, 2012

birthday invitation

we needed some special invitation,
homemade of course!


We looked around Pinterest
and found Passport invitations are all the rage,
so we went with the trend!

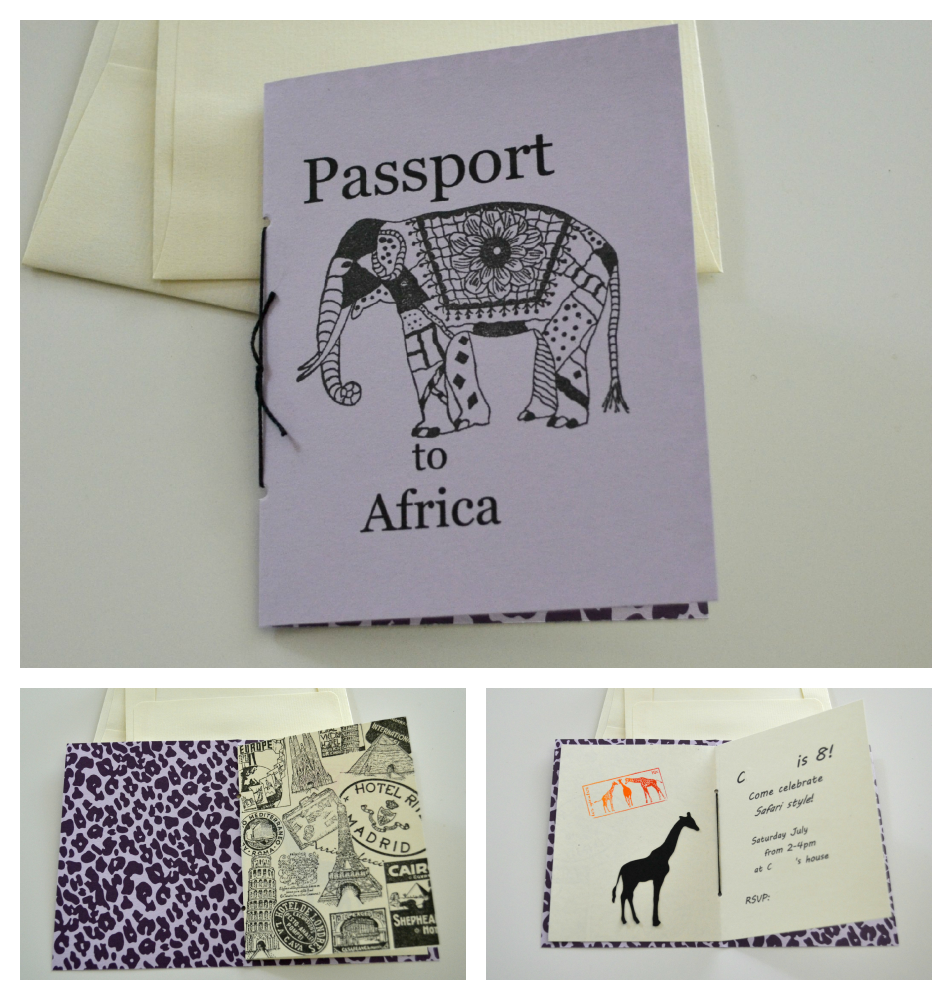
Using the computer, I wrote "Passport to Africa" leaving enough space
to stamp our beautiful elephant (probably Indian, but good enough).
We printed on the reverse side of this purple animal print cardstock.
Afterward, I realized I should have done a better job centering the print!
The automatic border of the page messed it up a little,
but it did not disturb Miss C. so we kept going with our project.

We cut the paper (we made 2 passports per sheet of paper),
and stamped the elephant (Magenta) in black ink.


When the passport is opened, the print can be fully appreciated!
For the inside, we used an off-white cardstock, folded in half,
and cut a little smaller than the cover.

We stamped the cover with a travel stamp,
resembling what would be stamps from various countries,
after all our guests were world travelers!


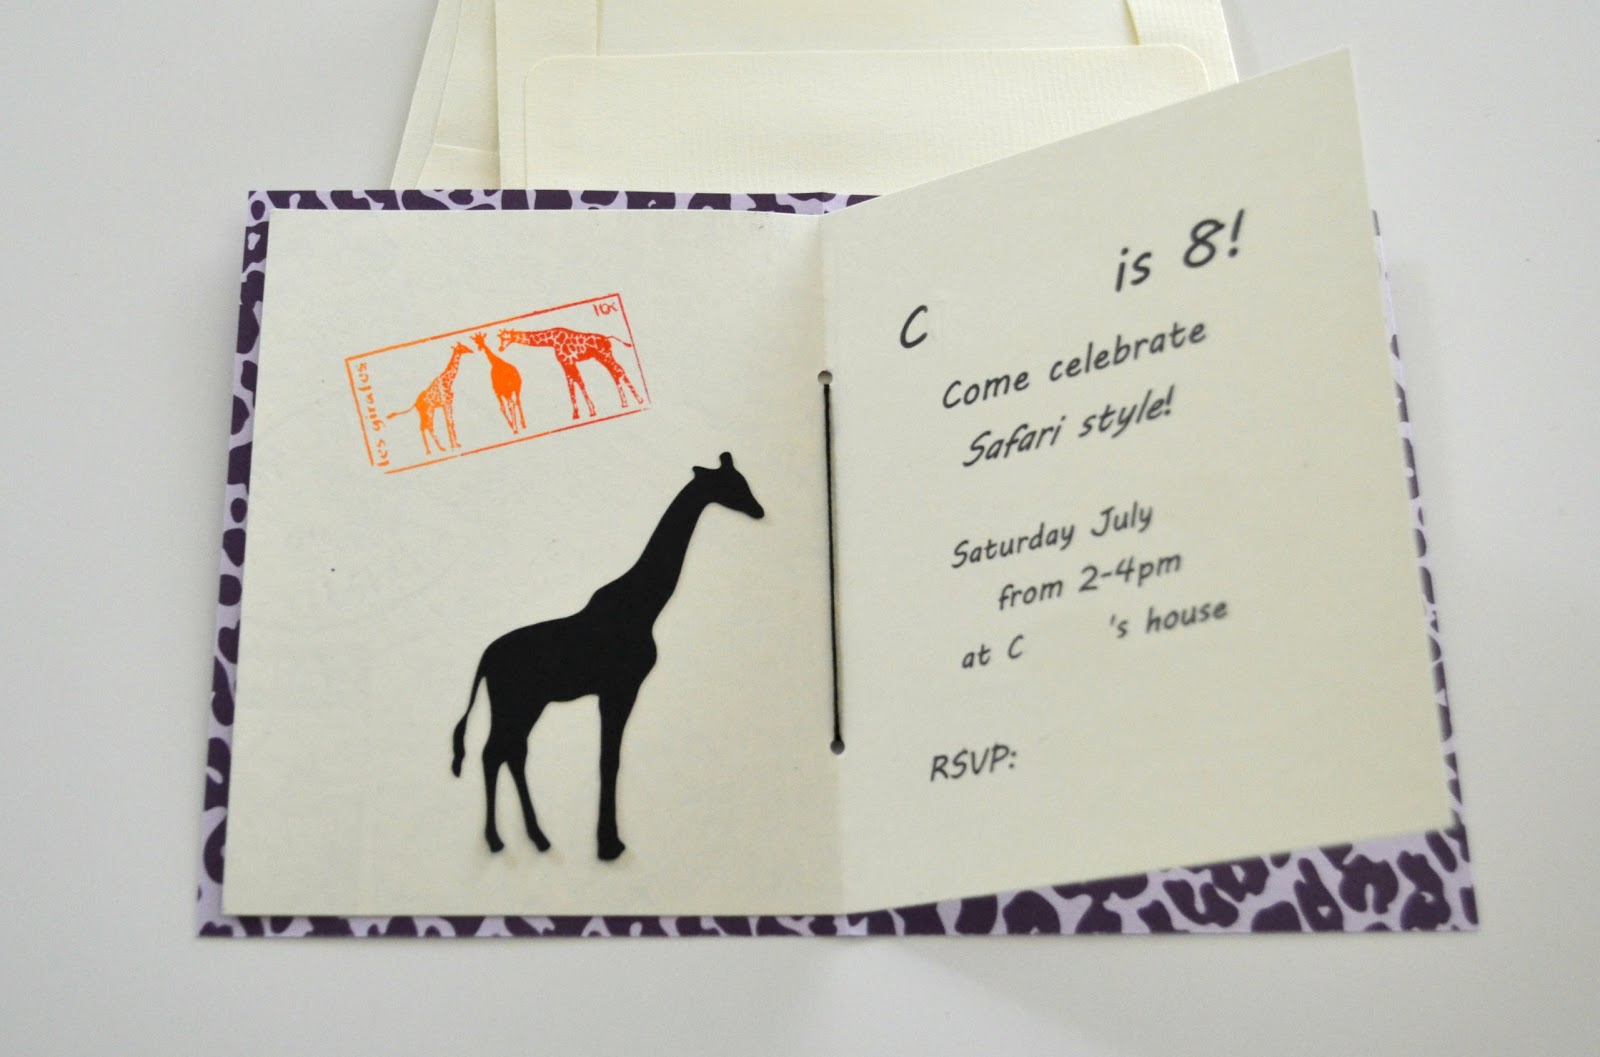
On the inside we printed the information about the party
(I have removed most of it, for privacy reasons)
We added some colors with a giraffe stamp,
and a cut-out giraffe 
(same animal that we used to decorate the cupcakes)
We left the rest of the pages blank.


To attach all the pages together, I used a small hole puncher,
and with both layers together, I punched 1/2 holes on the edge.
Then with black embroidery thread and a big needle,
I tied a knot on the edge.

Miss C. was very proud of her invitation, 
she kept saying it looked like they were store bought!
I love her enthusiasm,
I guess having her involve in the project makes it that much more special!


So I will not start any time soon making professional invitations
(not that I was planning on doing it!)
but I am pleased with how they turned out,
and more importantly that all of our guests enjoyed receiving them!
Have you ever made your own party invitation?
Any tips for next time?

Happy day!

A Crafty Soiree

Tuesday, July 24, 2012

birthday party: safari style!

Last week end, Miss C. celebrated her birthday with her girlfriends,
her request: it had to be animal related, her passion.
So we came up with the idea of a safari,
I had "Out of Africa" vision,
she thought hot pink animal!

Here is how we compromised:


A perfect mix of wild print with strong color and more neutral decor!

The best part is that we had most of the element already,
no need to purchase fancy things, besides loads of candies and treats!
A fair amount of shuffling around was done: the picture is from our bedroom,
the buffet cover is the curtain from the living room (drop clothes are so convenient!),
the wood animals are from the dining room (most come from far away trips)
the tray is also from the dining room.


Miss C. came up with the idea to use ribbon to decorate the ramekins that hold the candies,
she just used tape to secure it around the base.
Brick Master was also helpful, he was in charge of naming and creating all the tags
for the various treats, some of names:
coconut juice, fruit, snakes, worms, monkey slices, flowers, snake eggs, elephant ears.


We used the memories slice to cut all the animal shapes,
and he used a mini alphabet stamps set to write the names.


We used the same tools to make cupcake toppers
for the vanilla cupcakes with home-made chocolate icing.


I made a simple layered cake (yellow cake with home-made vanilla butter cream),
 I used some tattoo from Charm City Cake, it was perfect for our theme,
and surprisingly easy to use. I was a little concerned but it went well,
I made the cake the day before, iced it a few hours later, refrigerated overnight,
and applied the tattoos the following morning, pipped some more icing to hide the edges
and called it good.
The girls were very surprised and happy!


Doesn't it look nice?
Nothing says Happy Birthday like 4 layers cake!


The table was very simply decorated:
Miss C. used her collection of animals to make
a circle of life. 
We had purchased wild print plates (with lime green rim!)
The chair of the Bday girl was recovered in a cotton print with animals (secured with tape!).


And finally the back table with the goody bags
and space for the gifts.
I made the quilt many years ago for the kids'room,
and it looked perfect for the party.


It was one fancy party
and the birthday girl just loved it all!
It is official, my baby is 8....


Happy Birthday Miss C.!


Christmas crafting: it was a busy month!

This December was very busy with a lot of crafting, sewing, quilting, baking. I found it easier to share on Instagram (not something I thou...