Wednesday, November 9, 2011

the 12 days of mittens: day 2

Yesterday's mitten idea was the advent calendar,
great way to use of lot of them,
cool but how do I make them?
Well after making them for the past 10 years,
I got a pretty good technique!
It all started with this mitten that I made for Christmas 2000:

(quite country!)
I always liked the idea of using mittens
instead of stockings,
probably because in France we do not have stockings!
(the traditional way is shoes by the fireplace.)
But also because mittens are not Christmas specific,
they are wintry, so they can appeal to every one.
Over the years, I have made a few different versions,
which range from minimal hand work to all hand sewing.
Here is my latest version as seen on the advent calendar:
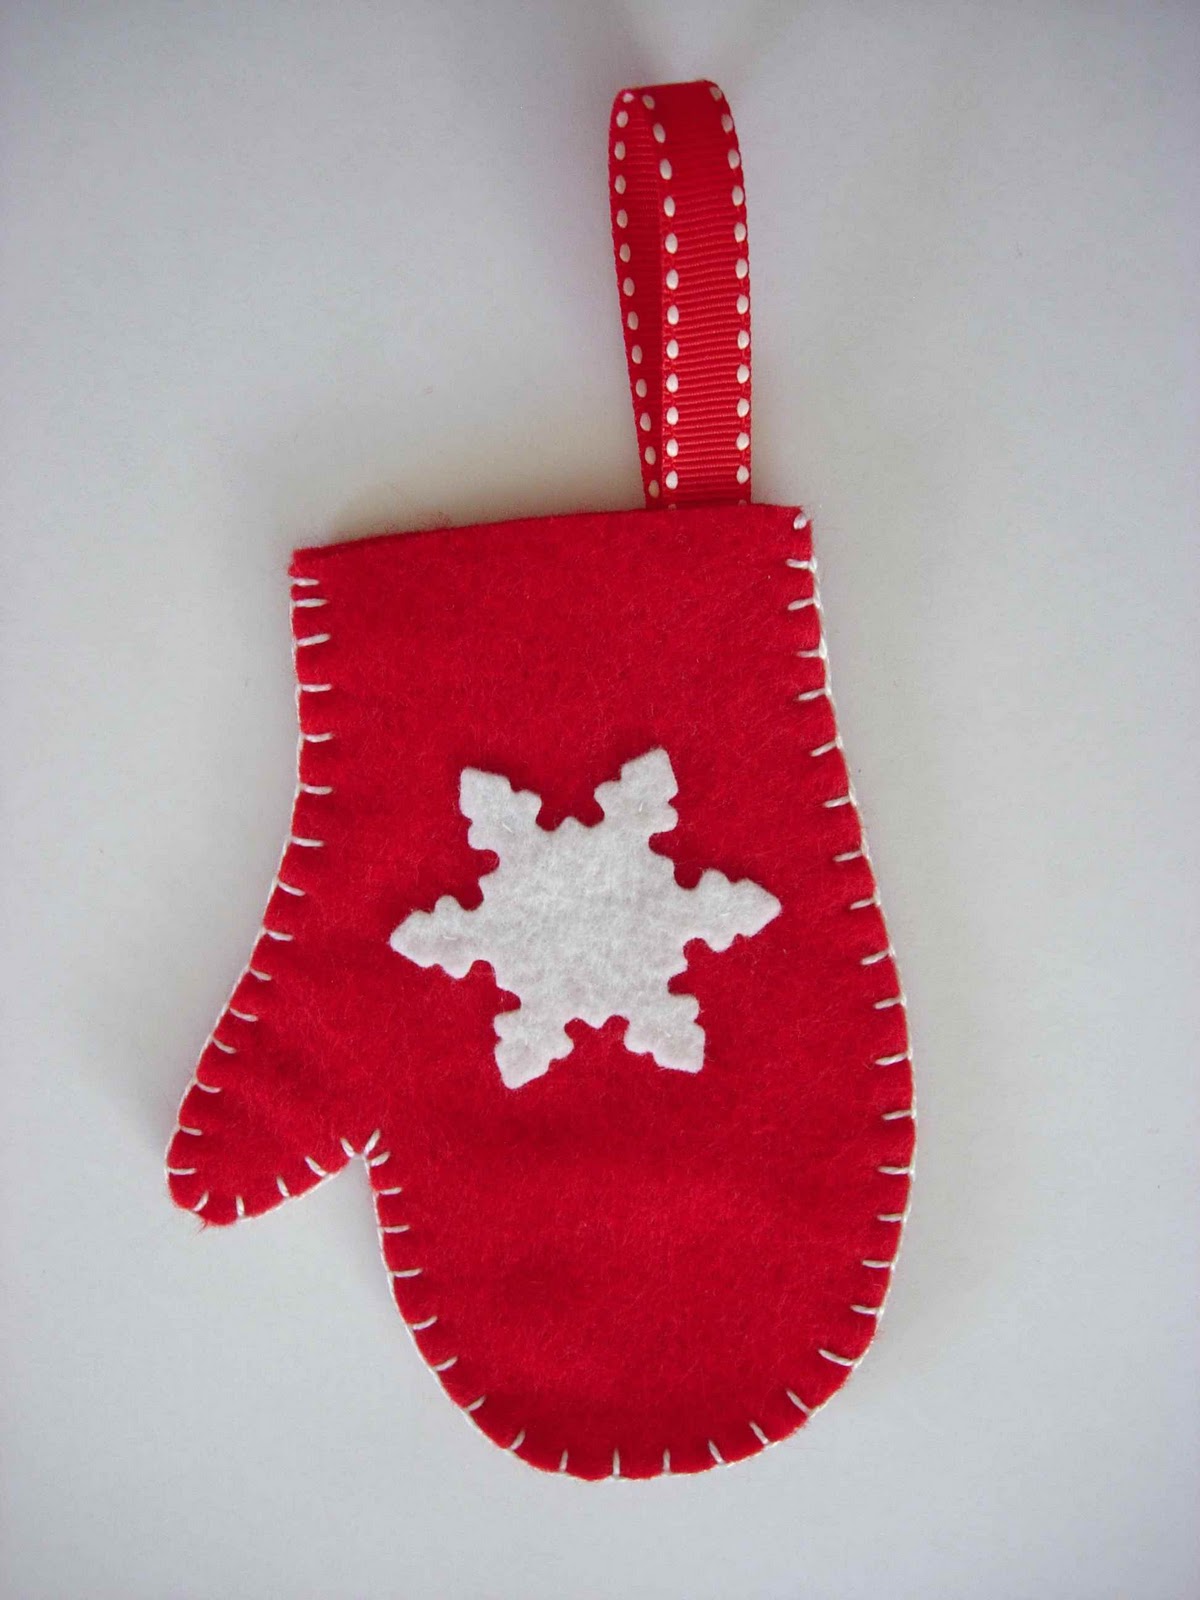

all hand made.

Here is how I make them:


Step 1: I cut the snow flake with a die cute machine
 (very old school, but great with felt)

Step 2: I hand stitch it on its 6 points

Step 3: I cut both layers of felt with my pattern.
(you can use a little kid mitten for size)


Step 4: half way point!

Step 5: I stitch a 5 inch ribbon in half
inside the mitten,
(you can see the stitching form the flake)

Step 6: I use a blanket stitch to go all around
the mitten, I use a white DMC cotton perle,
it is thicker than regular DMC cotton floss
and more expensive, but it works better.

I always try to have enough for the entire mitten,
so that I do not stop and start.
Because of the high contrast,
it would show too much.
The correct length seems to be about 60 inches.

Now you know all about "this year" mitten!
Go ahead,
make a mitten!

Happy sewing!


Tuesday, November 8, 2011

the 12 days of mitten: day 1

For my first day of mitten,
I want to start with a great project:
the advent calendar.


It is a little work intensive
but I have a lot of mittens!

After making the required 24 mittens,
the directions for making the mittens will be given tomorrow,
here and here,
I made a rustic tree.
I started with a 3 feet tall 1x1 inch piece of wood
and a 4 feet long 5/8 dowel,
they are located together at Home depot, near the molding.


I drilled 4 holes in my 1x1 at: 8, 16, 24 and 32, with 5/8 bit.


I cut the dowel in 4 pieces:
6, 10, 14, 18. (no left over here!)
I inserted the dowels in the holes (with the help of a rubber mallet!)
the longest one at the 8inch hole,
the shortest one at the 32 inch hole,
and the rest in between!


For the base, I used some scrap wood,
some 1 x 4 and some 2 x 6.
I cut the 1 x 4 to 3.5 inches to have a square base,
then I cut the 2 x 6 to 12 inches,
it made the base wide enough.

The tree is attached together by a long screw at the base,
through both 1 x 4 and 2 x 6, and through the dowel.
To the top of dowel I attached a finial.
And finally I painted the tree with some white trim paint,
so it is a little shiny!


I added some treats to each mitten,
and every day, we can remove a mitten, eat the snack (!)
and count how many days are left!


Happy crafting!


sew many ways


Link Party


Positively Splendid

the 12 days of mittens

For last weekend show,
I made a lot of cute mittens.
I have been making them for many years,
using them in many different ways.


Well I sold very few
and so I am left with quite a lot of them.
While Mon Cheri and I were seated by the fire,
 we started joking about them and their many uses.
Right there, we came up with this crazy
and silly idea, 12 ways
to use/make/place mittens,
so it is official:
here comes " the 12 days of mittens"
some will be legitimate but some will be silly,
after all crafting is not that serious a business!

Happy day!


Monday, November 7, 2011

shall I do it again?

Yesterday Holiday Boutique was not really a success
but not quite a failure!
Just a nice shade of gray....
Most of my customers were people I knew,
I was proud to show my work,
and most people seemed to enjoy it,
so overall a positive experience!


I can see why a lot of crafters decide to go through Etsy,
one can pace the work and the schedule,
so I am definitively considering it,
Mon Cheri has been pushing that way for a while,
but I did not feel I was ready,
my work was ready but not me,
if it makes sense!
I can see more soul searching in the next few days,
and very little sewing,
I feel a major burnout!
So I am off to do some painting,
house painting!
Happy day!

Sunday, November 6, 2011

getting ready

I have been busy sewing away
for the craft fair for a month,
I think I am done,
now I need to decorate my table.
You know how sometimes you see a store
and you want to buy something from it,
you do not know what, but there is something about it
that makes you want to get something,
well at least it happens to me!
I am trying to replicate that feeling,
at least making it interesting,
drawing people over to look at my stuff,
I won't say it is perfect
but this is the beginning!


For the table, I decided to use drop cloth
as my tablecloth, it is big and  has great texture.
I made a little basket to carry my business cards,
It should fit my little decor nicely,
it made of 3 different fabrics, some recent,
some older, but still cut,
I am a fan of the print: blue, green, red,
perfect for the Holidays!
I also made this cute little apron
from the same print,
the pattern is "Retro Aprons" by Cindy Taylor Oates.


I guess my Holiday decor will fairly traditional (red and white)
but with a touch of blue,
after all it is my favorite color,
hopefully it will not look too much
like a flag!


I am off,
wish me luck!

Happy day!


Thursday, November 3, 2011

lunch bag

Yesterday, Mon Cheri forgot his lunch bag
in the metro...
luckily it was purchased many years ago,
so no feelings were hurt!

I jumped at the opportunity to make something...
I do not get many chances to sew for him!

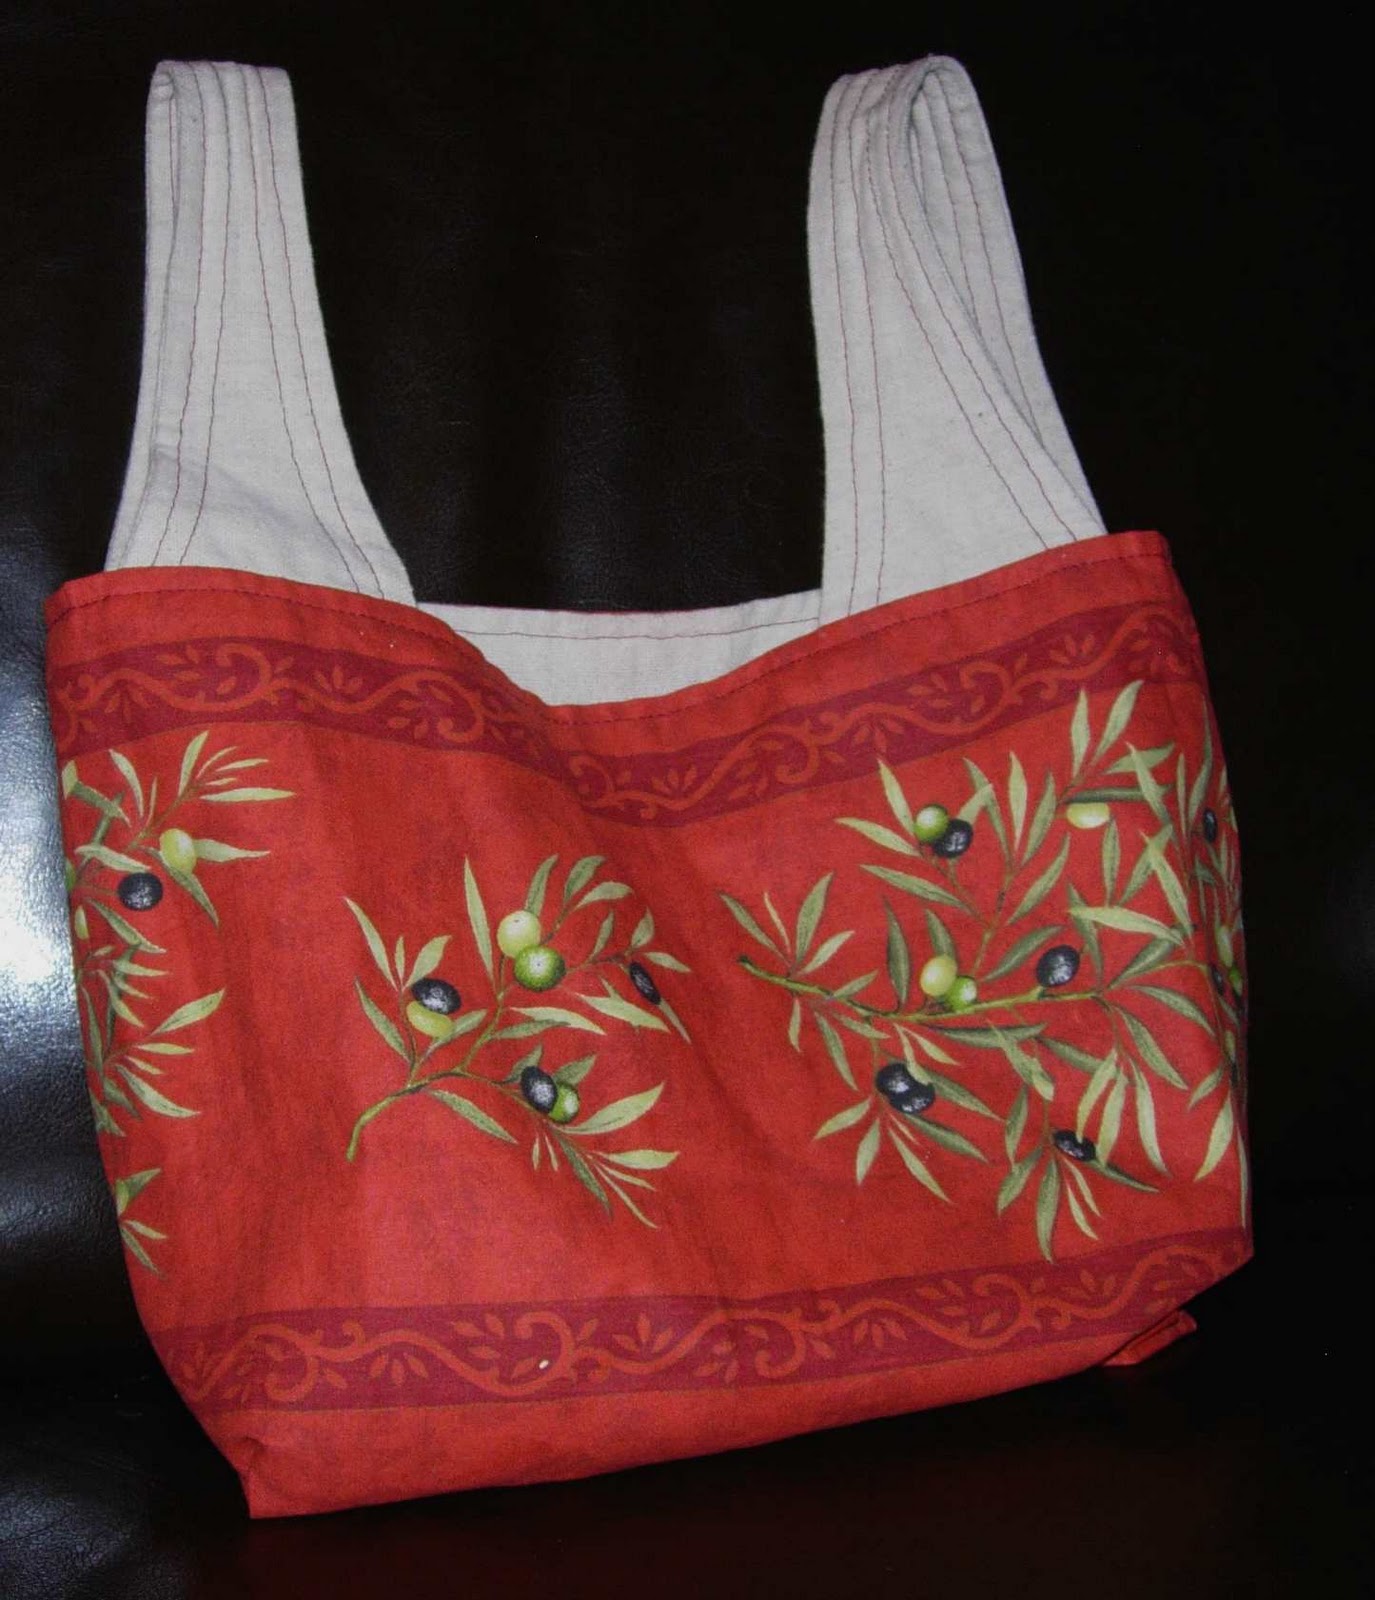
Earlier this year, I made many grocery bags
(here, here, and here)
So when I saw the mini version,
I knew it would be perfect.

I chose a beautiful fabric from Provence,
it is a rich color, with olive branches.

I lined it with osnaburg, nice texture
and sturdy! I also used it for the handles,
top stitched in the same rouille color.
Mon Cheri like it but found a little too....
what should I say, too obvious?
So it will be used inside out...
still looking good,
just more discreet!


His lunch fits perfectly,
we have a happy camper!

Happy sewing!


Tuesday, November 1, 2011

presents for a friend

Last week end, we celebrated one of our friends' B-day.
Of course I had to make her presents:
she likes drinking coffee,
so I thought this would be perfect!


I used this tutorial from In Color Order to make the coffee cozy.
I have some already cut left over fabric from
so it was the perfect way to use some of them.


And while I was at it,
I also made a mug rug to complete the look:
just some rectangles together with a border,
for the back I sued 3 different pieces
(the blocks were cut 6.5 x 6.5 to make it easier for my daughter!)


I think it looks great together,
and my friend liked it!

Happy sewing!


Monday, October 31, 2011

happy Halloween

Today is the day,
happy Halloween!
The pumpkins were carved in front of the fire place
while the snow was falling this week end!
It did not stop the kids from having a good time,
and it made roasting the seeds totally weather appropriate!

I finished Brick Master's knight costume,
within 30 minutes of our departure
for the school party....


His costume is made of many layers:
a "chain mail" shirt,
a tunic and a cape.
The shirt and cape are made from McCall pattern 2854,
a simple pattern.
The shirt is fairly wide, it works well with the
shiny fabric.
The cape is made of felt,
with a top layer around the neck
of pseudo leather,
I was inspired by the capes from
the " Season of the Witch" movie,
obviously not as fancy, but with some extra details!
For the tunic, I made up the pattern,
just a simple sleeveless top made of
drop cloth, my favorite!
It has just the right texture and roughness for a knight.
Of course it would not be perfect without
an emblem: we chose a griffin.
I printed out the design, recopied it on wonder under,
ironed it on green batik,
and very carefully cut it out.
It was ironed on and I free motioned stitched
it to the tunic,
it is the perfect accent
and adds tone of personality to the outfit.


Tonight will be cold,
but Brick Master will be warm under his armor,
now I need to make a cape for Rapunzel,
or Miss C. will be freezing!

Happy trick or treating!

Linked to Skip to my Lou


Sunday, October 30, 2011

purple costume done!

I finished the Rapunzel costume
for Miss C. a few days ago,
just in time for the Halloween party last night
at school.

It turned out more complex than I thought
and with a lot of details,
so it took a lot longer than planned.
I modified slightly by making short sleeves
and omitting the over shirt.
In my costume experience, the satin hold up very nicely,
even to intense daily play
but not the organza/chiffon.


This costume, I should say this gown,
 is fully lined with tulle on the petticoat.
I used some beautiful velvet for the top,
and satin for the rest of the dress.
The lining is part purple quilting cotton
 (left-over from Miss C.'s quilt backing
and part natural muslin, with 4 yards of tulle.
There is also a lot of lace,
eyelets and pink rattail.

As you can see on the pictures,
she loves it!
yeah for me!
She looked perfect with all the other Rapunzels!

Happy sewing!

Linked to Skip to my Lou


Friday, October 28, 2011

the tiny book case

Last year, after I was done building
the doll bear bed,
I made fast and poorly
(in my defense it was really cold in the garage!)
the little book case that hold "my new sewing machine".


I used this tutorial from Pieces for Reese.
I only used scraps of wood,
left-over paint and some beaded board for the back.
It is far from perfect,
but that has never stopped Miss C. from enjoying it.
Our children seem far less picky than we are,
may be functionality over beauty?

Happy day!


Thursday, October 27, 2011

a new sewing machine....

I bought a new sewing machine....
at Target
for my doll!
Isn't it cute?
I could not resist,
I know it is not as nice as the AG one
from a while ago,
but it is here now and fairly reasonably priced!

there are also some other cute accessories:
iron, ironing board, fabric bolts,
sewing basket with notions,
over all very good.


I originally purchased it for myself,
but Miss C. thought it was way too cool,
so she is using it!

Oh well I still played with it for a day!
Did I mention that the presser foot goes up and down,
and the needle too!


Happy sewing!


Christmas crafting: it was a busy month!

This December was very busy with a lot of crafting, sewing, quilting, baking. I found it easier to share on Instagram (not something I thou...