Tuesday, December 31, 2013

a year in review

This is the time of the year where I look back at my work
and check for favorites, yours and mine.

Well this year, just like last year, it has been all about dolls!


The girl scout vest remains my most popular post,
I enjoyed celebrating Mardi Gras, Valentine's day, Earth day,
Fall/Halloween and Winter sports.


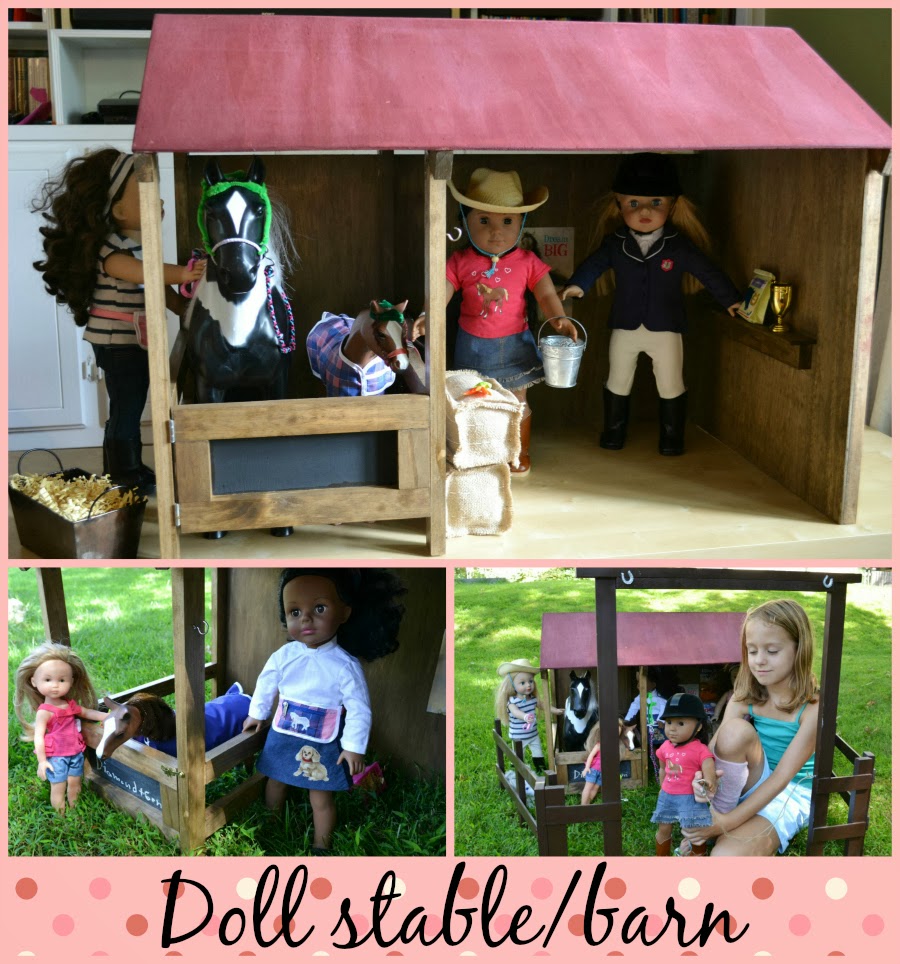
Another great moment was building the stable/barn for Miss C.'s bday,
it works perfectly with the ranch I made the previous year.

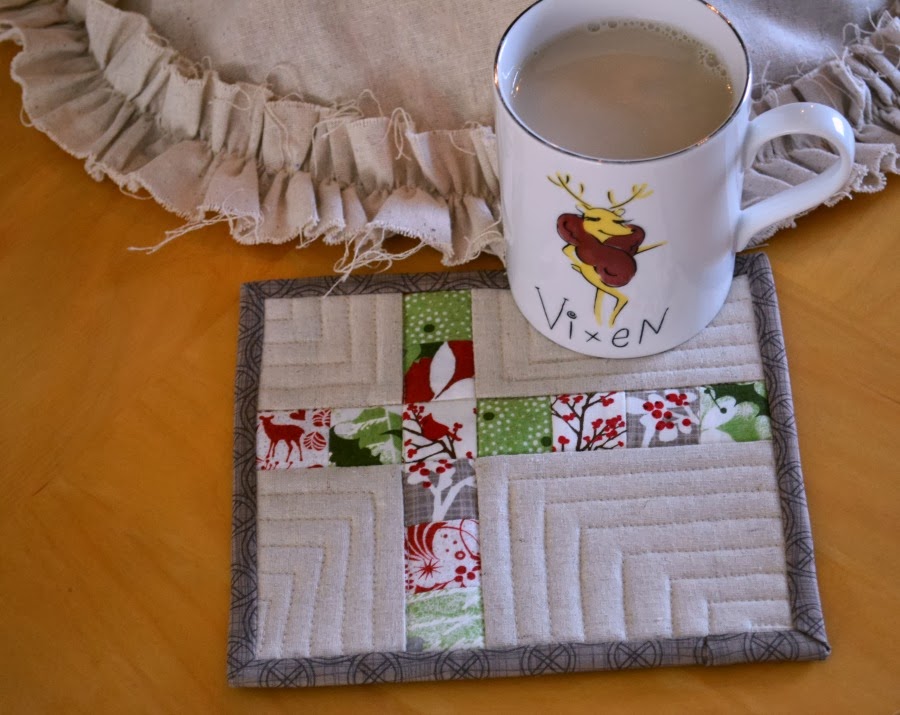
I managed to do some non-doll related sewing,
quilting remains one of my favorite activities!


Summer treats, Iron and dress, Sewing machine,
Tree skirt, mini quilt, Love pillow.

And I could not finish this year review without including the total remake
of the kitchen....I know I started the previous year but it was completed this year!


Actually completed might not be totally right,
I am thinking about adding a back-splash,
I guess we shall see what happens next....

Happy day!

Sunday, December 29, 2013

buche de Noel

For Christmas Eve's fest, I made a traditional buche de Noel!
It had been my goal for a few years,
but it had always fallen short of my expectation,
well at least of my memories.
But this year, I did it, alright it might not be perfect
but it felt right to me, and tasted delicious...
which is after the most important part!


After taking my French pastry class, I was ready to face this challenge,
I did it all just a few hours before diner....which had to be pushed a little so that I could finish!


This buche is a rolled cake with an espresso chocolate mousse and chocolate frosting,
 covered with shaving of white chocolate,
the cake is also moistened with a pastry syrup with grand marnier,
yep chocolate, coffee and orange flavors all together....


For the roulade, I used:
 5 egg yolks, 2.5 oz sugar, 1 tsp vanilla, 
5 egg whites, 2.5 oz sugar, 4.35 oz cake four, pinch of salt.

For the mocha ganache mousse, I used:
4 oz semisweet chocolate (chopped), 1/4 cup of milk, 1 tsp instant espresso powder
1/2 cup of heavy cream

The syrup is simply one part sugar, one part water, boiled until clear.
Once it is cooled, it can be flavored with juice, vanilla or liquor.

For the frosting, I followed the recipe on the back of the Hershey's cocoa:
1 stick of butter, 2/3 cup of cocoa, 1 tsp vanilla,
3 cup of powder sugar, 1/3 cup of heavy cream.


It was so tasty, everybody just loved it!
I think they will want another one next year!

Happy day!


Thursday, December 26, 2013

baby doll outfit

For Christmas, My niece K received her first AG doll, a bitty baby.
I felt it was my duty as the crafty aunt to make some toddler friendly clothes for her new baby.
She will be 3 shortly so if I remember properly, it is still really hard to put on doll clothes,
so I made them easy to put on and off, with little (Velcro) or no closing.


Most of these clothes work also for a big girl doll, like Kaya.

I started with a simple long sleeve T-shirt following this great pattern/tutorial (free)
 from the Scientific Seamstress,
the directions are easy to follow, the T-shirt fits well both dolls, and there are 3 sleeves length
so that it can work for most dolls, I choose long sleeves for the baby,
so they are 3/4 sleeves on Kaya.
The fabric comes from a new knit shirt (craft store), I used the edges to save some time,
I aligned the bottoms of the shirt and sleeves with the edges of the shirt, no hemming necessary!


Then I sewed a simple reversible skirt from this free pattern from You Can Make This,
I have made some many versions of this skirt,
it is super fast and easy and it fits just about anything,
including stuffed animals!
I tried to use 2 fabrics that would work with the T-shirt,
one sweet flowery print (seen on the baby)
and one modern print (seen on Kaya). 

Next I sewed a little dress without any closure,
it goes over the head of the baby,
it can be worn with or without the T-shirt.


I purchased this pattern from You Can Make This many years ago,
(it is also from the Scientific Seamstress)
for Miss C. to make her dresses and tops, and it includes the sizes for dolls.
I made this outfit for her and her dolls when she was in preschool...


I kept this dress simple, once again hoping to make it easier for a 3 year old to play.
The straps have elastic inside for a fast dressing of the doll.
I tried again to work with a print that work with the T-shirt,
and who does not love some heart print?

Finally it was brought to my attention that it was winter and that the baby might be cold
in all of these warmer weather clothes....Miss C. is my consultant!
So I added a little cape and a beret.


I had made both of them before, so I knew they were fast and easy project.
Both are made of fleece, great for sewing and playing.
The cape pattern (free) is from Strictly Homemade, I made the circle a little smaller as the baby is not as big as the big dolls, and skipped the button.
The beret pattern (free) is from American Doll Outfitters, it is a little large on the baby,
but my baby is not an AG baby so hopefully the real one has a bigger head!
It does fit the big girls really well.


Happy sewing!


Tuesday, December 24, 2013

Merry Christmas

Today I am busy at work,
hoping to finish early to make some delicious Christmas dessert
that we can enjoy tonight.
I wish you all : Joyeux Noel!

Here is a copy of the card we sent to our family


Merry Christmas!


Saturday, December 21, 2013

skating outfit for doll

Miss C. did not win her contest, she was a little disappointed,
so to cheer her up I made her doll a new skating outfit,
and purchased some actual skates from Michaels.


I followed an old Simplicity pattern (4364),  it is the same pattern that I used previously to make
 2 dance outfits: a traditional pink one and a more modern white one


The fabric is a beautiful stretchy and shiny material,
a lot more pleasant to work with that those velvet I sewed with to make the ballet outfits!


The pattern is great for the leotard but I felt that the skirt was not right for a skating outfit,
so I came up with my own design, it is not perfect but I like the lines better,
Miss C. is pleased with it, which is always my goal,
she is after all my only customer!


Yep, she is happy!
But she felt that all the girls should participate in the photo shoot,
 so she dressed them all in some winter outfits.
And here there are joining Polly and her ice skating event:
Rebecca, Polly, Nevada, Mathilde and Camille in the sled with Pepper.


Happy sewing!

Tuesday, December 17, 2013

a little sewing for girlfriends

While time is getting more and more precious,
I wanted to make some little presents for some of my girlfriends,
nothing too fancy and too complicated (which means time consuming!)
but still special that "speaks" to the receiver and the giver....
So I made a few little pouches.
well I have completed them and they are ready for gift-giving:


I followed this tutorial from Noodlehead.

It is a great little project even when made 7 or 8 times!
It is a lot faster than other pouches I have made,
there is no quilting or fancy cutting in these ones
 (unlike this one and that one!),
but their simplicity makes them sweet!


I even managed to made one for myself.... 


Happy sewing!


Monday, December 16, 2013

cranberry scones

Usually on Sunday morning, I like to make cinnamon rolls,
no, not homemade, but the Pillsbury way! It is still like making them right?
Well last week I found a great recipe for cranberry scones,
and I broke tradition and made them for breakfast.

Don't you love how the scone became the reindeer's face....!
Note to self: use plain plate!

I followed this recipe from  Jenny Steffens Hobicks, her pictures are so much better than mine,
I get the feeling she does this a lot!
It still turned out to be totally delicious,
I will be making more of them!


Happy day!


Sunday, December 15, 2013

pretty tags

This year, I made a few fabric tags to accompany some homemade presents:


They were easy to make, I used this panel from Moda Winter's Lane 


See these little tags on the right side?
Just the perfect touch for hand made gift, or a little hand touch for a purchased gift!
I ironed some interfacing on the back of the tags, did some simple embroidery,
sewed them to some scrap fabric from the tree skirt, and finally added an eyelet.

For the bird gift tag, I went over a lot of the red dots with French knots,
it adds a lot of dimension to the tag.
 While it takes a little time to do, it is really easy.


For the birds in nest tag, I sewed a seed bead over each snow flake with some hand quilting thread,
it is sturdier than regular thread (I did not want these beads to fall off!).
Some of them are really close to the edges and they made finishing the tag a little challenging....


For the last tag, I did some simple stem stitch over some the pine tree trunks,
keeping with the nature and more masculine feel of the tag.


I think they turned out really cute,
obviously not every gift needs such a fancy tag!

I used the large rectangle of fabric from the panel to make another gift bag,


It looks so perfect with the woodsy tag,
yep it is all coming together!

Happy sewing!


Monday, December 9, 2013

tree shape mug rug

Even after making my favorite mug rugs,
I was still left with scraps from my tree skirt.
I wanted to make something different than the same mug rugs,
it gets a little to repetitive to sew and to give 
(and receive, my family can attest of that!)


So I sewed these cute tree shape coasters.
I followed this tutorial from Stitching and Bacon.
I did a good job following the directions for the first one,
but after that I decided it needed more piecing,
but the shape remains the same.


I think it is a great addition to my collection of mug rug.


Time for some more tea!
In case you are wondering, I do have more mugs, even more deer mugs
but there is only one girl reindeer so we are stuck with this one...
I do have to share it with Miss C. who also loves this one,
may be we should get another one,
PB sells them every year...

Happy sewing!

Friday, December 6, 2013

doll skates to win a contest!

Today, Miss C. writes her first post,
she just entered a contest to win a Saige doll,
and wishes to share her story with all of you,
and all the crafting that went with it.

Here she is:

Hi I am  Miss C.
the other day I made some ice skates.
And I came up with this story:


My doll is skating for fun.


Then she sees a flier and enters the competition.


Then she performs.


And she wins 

In the contest the prize is either a Saige doll or a mini Saige doll. Over and out.

Here are a few details that Miss C. left out:
she made the skates for Polly following a you tube video of My Froggy Stuff,
they are made of many layers of cardboard.
She also made the ice ring.
She came up with the story, set it up all by herself
and took also all the pictures.
I am very proud of all her hard work.

Happy crafting!


Thursday, December 5, 2013

mug rug tutorial

After making my tree skirt, I was left with quite a few scraps of quilting and linen fabric,
so I had to make something with them,
it would be a shame to waste them!


It is this year version of my favorite mug rug (and one of my most popular post!)
It was originally designed by Mary of Pin.Sew.Press.


A few of my sewing buddies have asked me over the years how I made mine,
so I thought I would make a tutorial of my favorite mug rug.

Here are all the pieces required for this mini quilt:
4 pieces for the background: 2.5 X 2.5, 2.5 X 4.5, 3.5 X 2.5, 3.5 X 4.5.
12 squares 1.5 X 1.5 of various fabric.


stitch the squares together in the following groups:
2, 3 and 7.


Stitch the band of squares between 2 background pieces.


Stitch the long band of squares between the 2 other bands.


The top is complete.
Cut a piece of fabric for the back and some batting,
here I used some insulated batting but it is not necessary.


Quilt it which ever way please you!
It is so small, it is a great way to practice free motion quilting...


(even with diagonal lines, it still ended it a little crooked!)
If you want perfect symmetry, the angle has to be 45 degrees, and not to the corners!

Prepare some binding.
I used to make regular quilting binding (2 1/2" wide piece of fabric, folded in half),
but it is a little too thick for such a small quilt, so I made a simple single layer binding.
You can check out this tutorial on single binding,
mine is slightly different, but both work fine.


I like to hand stitch the other side of the binding,
I know it takes extra times, but I like the finished look.


And here you have your cute mug rug!


Also cute from the back, the raccoon was framed totally unintentionally!

Now see back and enjoy a nice cup of chai,
or whatever you drink....no judging here!


Happy sewing!

Christmas crafting: it was a busy month!

This December was very busy with a lot of crafting, sewing, quilting, baking. I found it easier to share on Instagram (not something I thou...