Wednesday, May 1, 2019

a sunny lunch bog

I love sewing little presents for friends and family,
and this little lunch bag was a present for a friend


who was quite envious of my lunch box:

(we eat lunch most days together!)

So of course I made her one for her birthday:


And since she works part time at a preschool,

It is just as whimsical as my other lunch bags:


it is a easy sew,
and the perfect place to play with various print:


I like to use some iron-on fleece for the interfacing,
and some water resistant fabric for the lining,

Happy sewing!

Friday, April 19, 2019

a stuffed bunny in overalls

I could not resist,
I made one more bunny:


Isn't he so cute with his overalls
and his striped shirt?


And look at that tail!

The pattern is again from Bustle and Sew
(April 2019 magazine)
It is a simple sew, mostly applique
with some hand embroidery details,
quite a fun project to make.

This little bunny's face reminds me a bit of
rilakkuma and miffy
no smile for this little guy!


but maybe the carrots in his pocket will cheer him up....


Happy sewing!

Monday, April 15, 2019

little goody bags for Easter: a tutorial

Over the last couple of weekends
I worked on making Easter goody bags
for my kids and nieces/nephew,
and tried not to eat all the chocolates!


The bags turned out really cute,
and there are some chocolates left,
so a total success!
I went old school for the bags
and put chicken on them
instead of bunnies.....


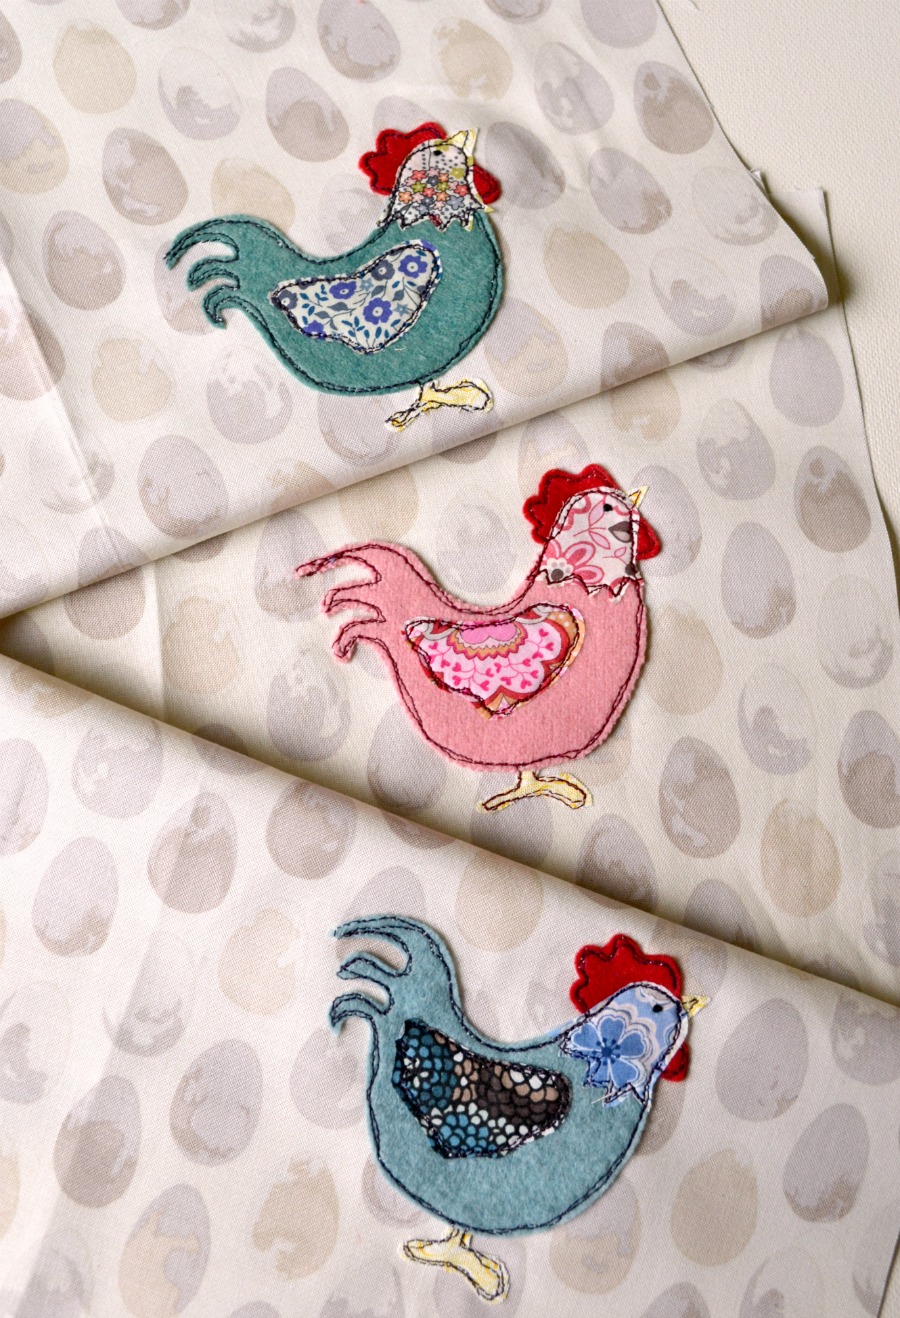
The pattern for the chicken is from Bustle and Sew (the April 2019 magazine)
They are a mix of felt and Liberty of London, fancy applique chickens!

So here is a little tutorial on making these little bags,
once you are done with the chicken, of course!


I started with a 16 x 8 piece of egg print fabric.
and appliqued the chicken, just like other sew illustrated things
I have been making lately.

Then I cut another print, same width but taller,
so that it can be seen from the top,
I wanted about a 1 inch visible, so 16 x 10.


I sewed it on the top, if the print is directional,
make sure it will be right side up once it is folded....
A little pressing then will be it easier 
when the lining is pushed inside the bag.

Then I folded the fabric onto itself
to make a very long rectangle,
and sewed all around it,
 except for a little section that is left opened.


From this opening, the fabric can be turned right side out.
After some ironing and pressing,
the opening can be stitched closed by hand
or machine, I like to do it by hand, it is quite fast.

Finally the lining is pushed inside the bag,
and voila!


I did a little extra top stitching at the top, 
between the main fabric and the lining 
(not seen on this picture).

To close the bags, I just use a piece of string
or ribbon.

I also made some other ones using some chicken wire fabric,
quite appropriate!
And the houndstooth is perfect for it,
it is known as rooster foot in French! 

The orange chicken bag is not lined, just sewn with French seams.

And here there are together,
waiting for this Sunday gathering!


Happy sewing!

Friday, April 5, 2019

a sweet bunny pillow cover

I sewed this cute bunny pillow for my sister:


the pattern is from Bustle and Sew.
It has a mix of applique and embroidery,
not unlike the embroidery boat we made together a while ago
(also a Bustle and Sew pattern!)
It was fun to use felt and cotton prints for the appliques
and embroidered most it by machine.
A couple flowers have hand embroidery
as does the bunny's face.


I made a very small pom pom with embroidery floss
for the tail, about a 1 inch in diameter.
It definitely will put any couch in a spring/Easter mood!

These bunnies that I made in 2012(!) are also perfect:

(pattern by Gingercake)

It had been a very long time since I made a bunny pillow,
we actually do not have any....


I must remedy this problem!

Happy sewing!

Friday, March 29, 2019

a Hogwarts suitcase

As you might remember from last year advent calendar,
we are fans of the Hogwarts world,
well especially Miss C.,
and it turns out my niece K is also a big fan.
So for her birthday,
I made her a Hogwarts suitcase,
full of life necessities!


And who doesn't love a little niffler?
Technically he does not belong in Hogwarts,
I am taking  an artistic license...

But let's check out that suitcase,
doesn't it look just perfect?
Once again, one more artistic licence
as it is a suitcase and not a trunk,
but it is perfect to play pretend
and go on sleepover with other 8 year old Hogwarts fans!


This inspiration for this suitcase comes from the Nicole Michelle Blog.
There are also other cool Potter stuff in that blog if you are interested.

I started with this little Christmas suitcase:


 where I covered the hardware with tape before spray painting it black on the outside,
and champagne pink on the inside.
Then I printed the logo from the tutorial and glued it to the top of the suitcase,
and covered the inside of the suitcase top with other print out of the Daily prophet
and other Potter paraphernalia....


and my niece K initial, just because!

Then I sewed a little drawstring pouch with a paper pieced star 
to store candies and other treats.
In it, I put some more Harry Potter stuff: gummies, beans and chocolates,
I found all of them at Lolli and Pops,
it is bit expensive, but it makes the gift!


Finally I added a cool t-shirt (from Target), some butterbeer,
some Harry Potter/magical beasts Lego
and Hermione's chocolate wand!


I could not help myself and printed out a train ticket:


And she totally loved it, which is the best!

In February, we went to Orlando Universal to enjoy
Hogwarts and the warm sun of Florida
(after a long cold winter here in the DC area!)

Miss C. loved it!
It was her Christmas present 
(and the last surprise from her advent calendar!)

Happy crafting!


Christmas crafting: it was a busy month!

This December was very busy with a lot of crafting, sewing, quilting, baking. I found it easier to share on Instagram (not something I thou...